 skyseat
Help center › Get started
Your first week with skyseat, day by day
From sign-up to your first report: hire, give them a computer and access, assign a task and approve what they ask.
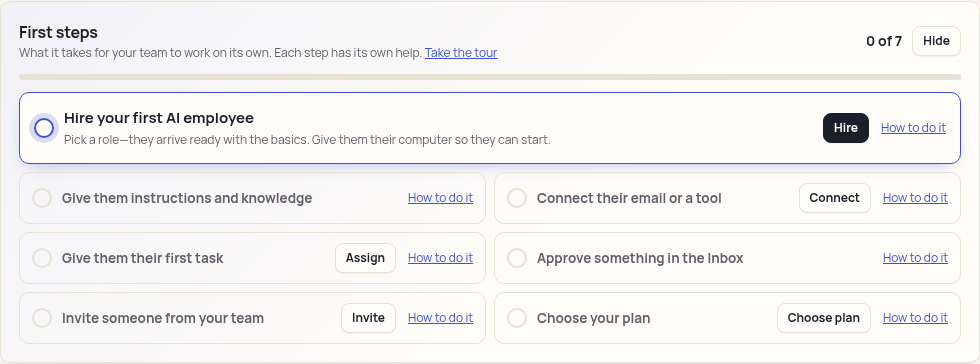
This guide is for a company that is just starting with skyseat. It is one possible order for the first week, not a required one: each step can wait until you are ready. The First steps list at the top of your Inbox always shows what is still missing.
Before you start
- Sign in with your welcome email. It carries a one-time link: open it, choose your password and you are in. Under Account you can turn on two-step verification.
- Connect your AI. Your employees think with Claude, so they cannot work without it connected. Do it under Account › Employees’ AI; the guide “Connect your AI” walks you through it.
Day 1: the tour and your first employee
- Take the tour, or skip it. The first time, the panel shows you the Inbox, the Team and the Control room in a few screens. If you skip it, you can find it again from the Inbox.
- Tell skyseat about your company. “Start” opens a welcome chat with your company’s brain. It asks four questions: what the company does, what takes up most of its time, which tools it uses and who approves things. At the end it proposes employees, rules and connections. Nothing is applied until you mark it.
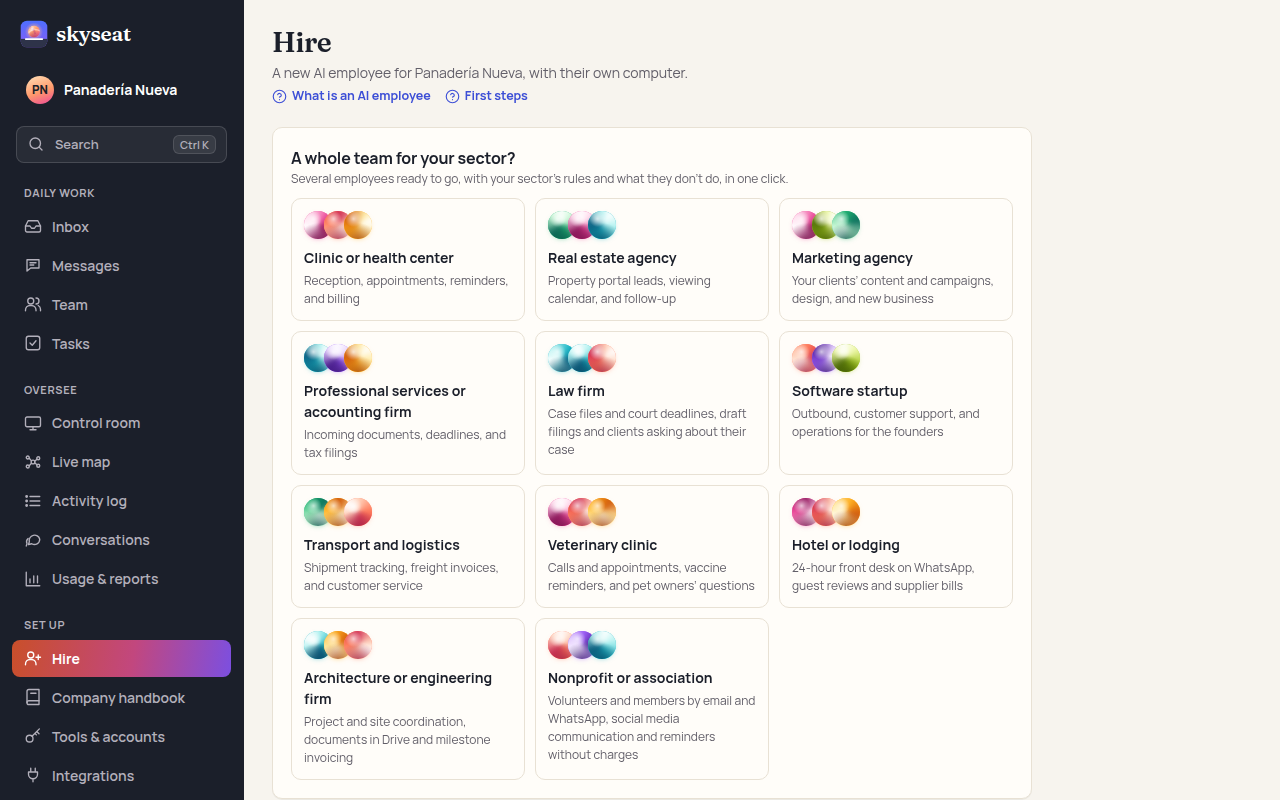
- Hire your first employee. In Hire, choose a role from the template (customer support, accounting, sales…) or a whole team for your sector. Give them a name and press “Hire”. They arrive with what is usual for that role, and you can change it later on their profile.
Day 2: their computer, their instructions and their access
- Give them a computer. On their profile, open “Computer & schedule” and press “Give them a computer”. It takes a couple of minutes to start. Outside their working hours it sleeps and costs almost nothing.
- Tell them how you work. Everyone on your team reads the company handbook before deciding anything. Guidance for their role goes in their “Instructions”, and in “Knowledge” you upload the documents and websites they need.
- Connect only what they need. Their email, their calendar and the tools you use (Google Workspace, Microsoft 365, Slack, HubSpot…) are connected from their profile or from Tools & accounts. Nothing is connected on its own: you decide, account by account, whether they only read or also act.
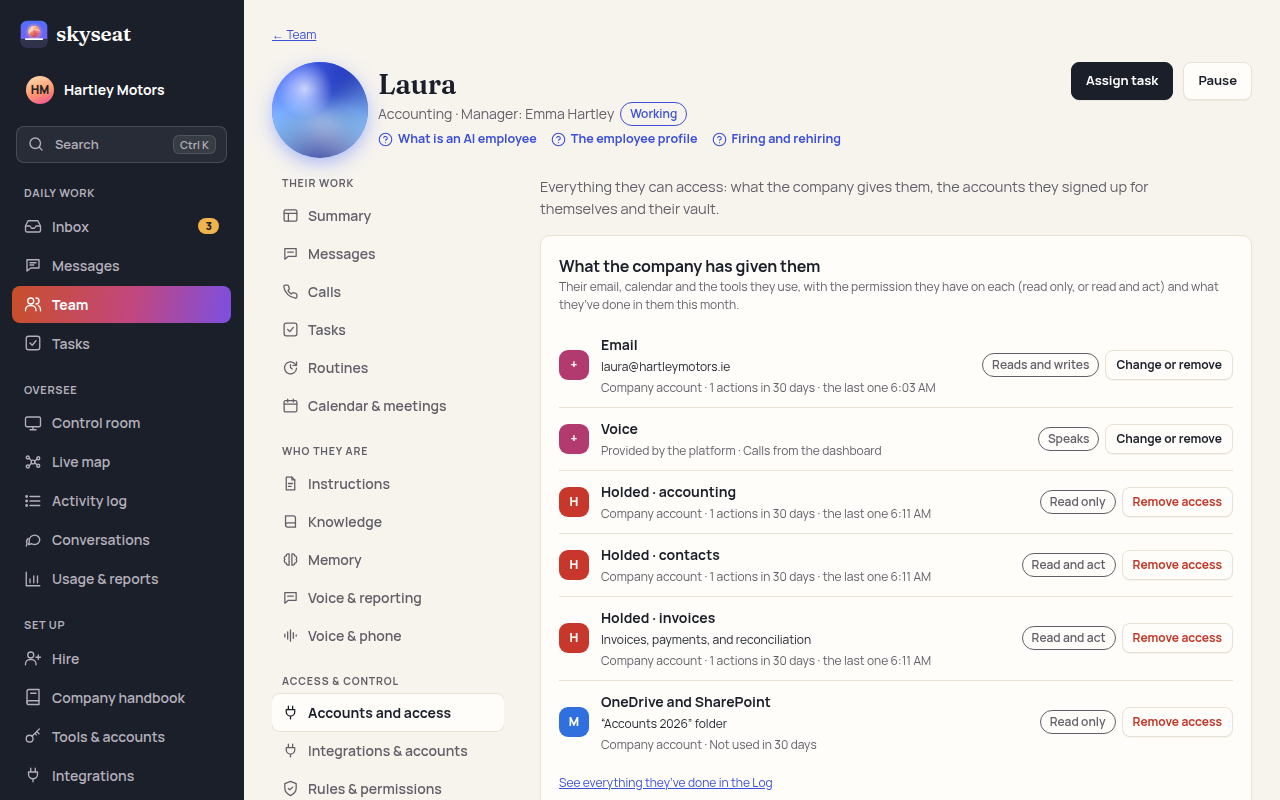
On each employee’s profile, Accounts and access gathers everything they have: what the company gave them, the accounts they opened on their own and their vault. Removing an access takes one click, “Remove access”. Only the people in charge of that employee can see it.
Day 3: their first task
Press Assign task on their profile. Start with something simple that you can check, for example: “Make a list of 10 local suppliers with their website and phone number”. In the Control room you see live what each employee is doing, and in the Activity log everything they have done, with the time.
Days 4 and 5: your first approvals
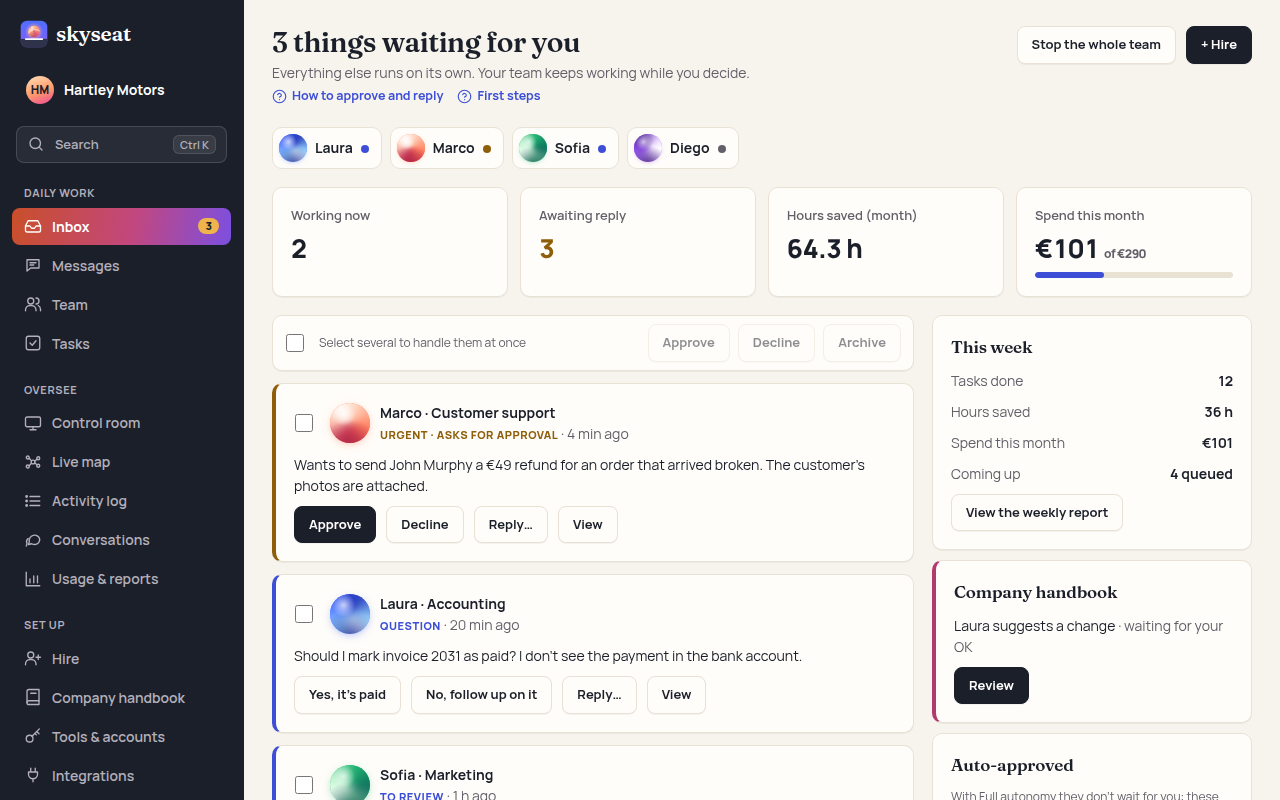
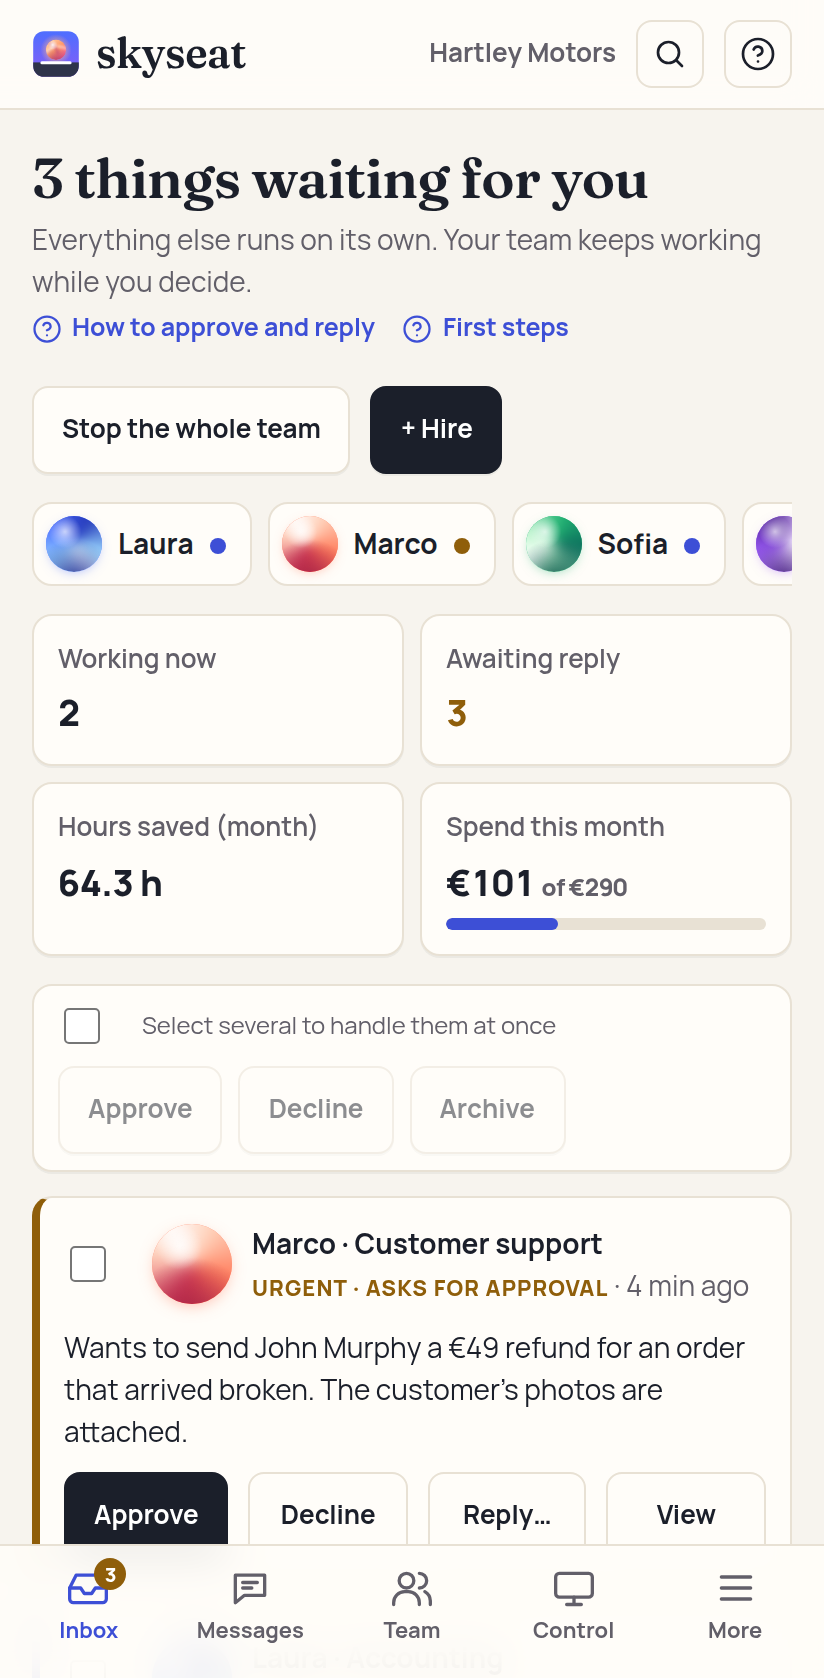
When they need your approval or have a question, it appears in your Inbox; the number next to “Inbox” in the menu is what is waiting for you. You can press Approve or Reject, type an instruction with “Reply…”, or open the item with “View”. What they ask permission for depends on the autonomy you have given them: we explain it in “Permissions, autonomy and spending caps”.
On your phone, add the panel to your home screen and turn on notifications, so you can answer wherever you are.
Every week: your report
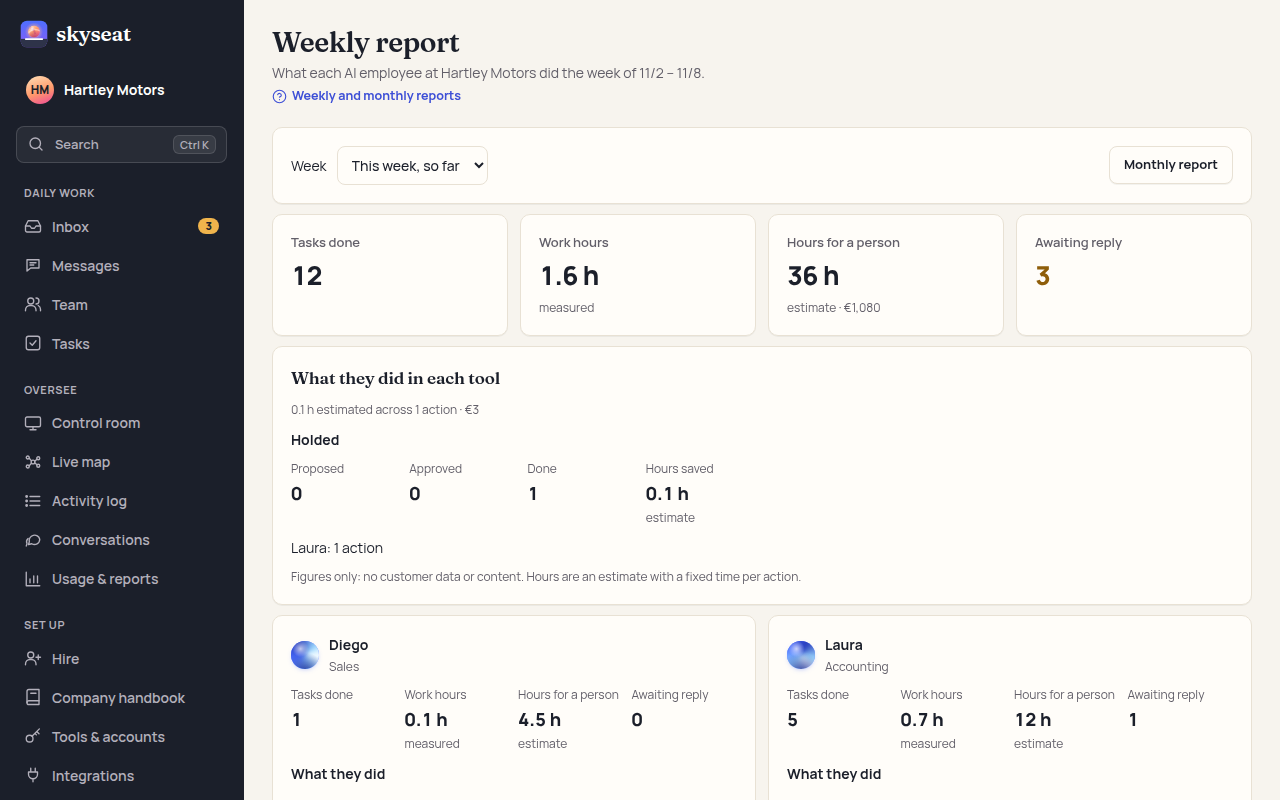
Each week the platform prepares a report for each employee: what they did, the tasks they finished, the working hours measured and the hours estimated for a person, this month’s spending against its limit, and what they are waiting on from you. You find it under Usage & reports › Weekly report and as the “Your week” card in the Inbox. It can also reach you by email.
It goes out every Monday from 8:00 (Madrid time) and covers the previous week, Monday to Sunday. On the same page you can choose Friday instead. The first week you will see little data: that is normal. The report is on by default, and whoever runs the company can turn it off.
Good to know
- skyseat is in early access. Pieces that depend on outside services may run in a clearly labeled test mode, with sample data and no real work or cost. The panel says so wherever it applies.
- If anything in this guide does not match what you see in the panel, tell us and we will fix it.
What to read next
Questions? Book a demo and we’ll walk you through it. Book a demo Request early access